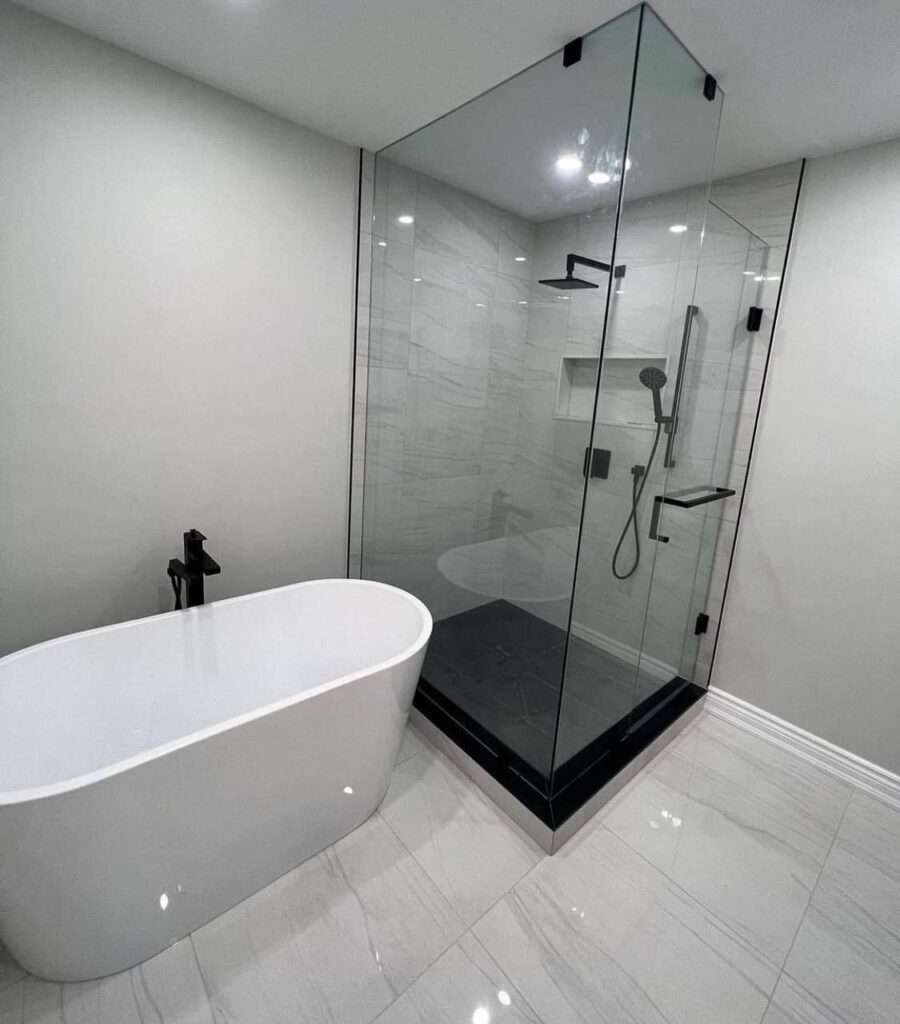
Installing tiles in your shower can transform the look and feel of your bathroom, but it’s not a project to be taken lightly. A well-executed shower tile installation can enhance the beauty and functionality of your space, while a poorly done job can lead to leaks and headaches. To help you achieve a successful shower tile installation, here are 12 pro tips to guide you through the process.
Plan and Design Carefully
Before you even pick up a tile, take the time to plan and design your shower layout. Consider the size and style of the tiles, the placement of fixtures, and any special patterns or designs you want to incorporate. A well-thought-out plan will save you time and money in the long run.
Waterproofing is Key
Proper waterproofing is essential to prevent water damage and mold growth. Use waterproof backer board, such as cement board or waterproof membrane, on the walls and floor of your shower area. Seal all seams and corners with waterproofing tape or membrane.
Choose the Right Tiles
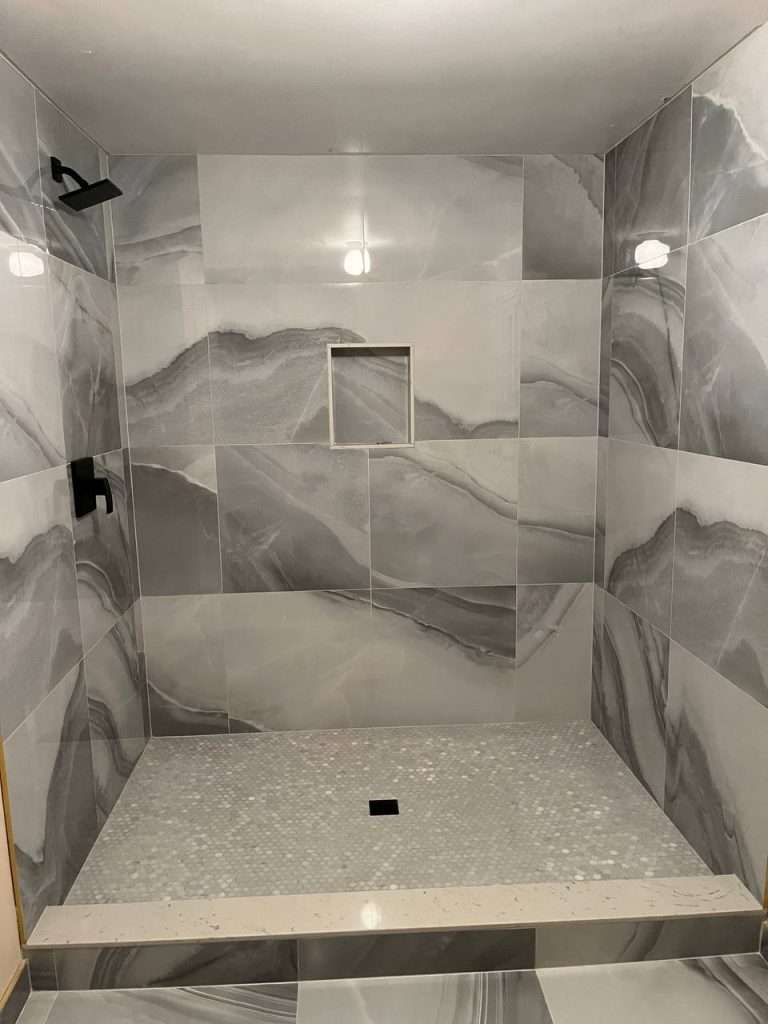
Select tiles that are suitable for wet areas. Porcelain and ceramic tiles are popular choices, but natural stone, glass, and mosaic tiles can also be used. Make sure the tiles are slip-resistant to ensure safety in the shower.
Invest in Quality Tools
Invest in high-quality tools and materials, including tile spacers, tile saw, trowels, and a level. A wet tile saw is particularly useful for making precise cuts.
Prepare the Substrate
Ensure that the substrate (the surface under the tiles) is clean, level, and free of any loose debris. Repair any imperfections in the wall or floor before you start tiling.
Dry Layout
Before applying adhesive, lay out your tiles to ensure they fit and create the desired pattern. This will help you make any necessary adjustments before the adhesive sets.
Use the Right Adhesive
Choose the appropriate adhesive for your tiles and substrate. Thin-set mortar is commonly used for most shower tile installations, but there are specific adhesives for different types of tiles, such as glass or mosaic tiles.
Mix Mortar Consistently
Follow the manufacturer’s instructions for mixing the mortar. It should have a consistency similar to peanut butter. Mixing it too thin or too thick can lead to bonding issues.
Apply Adhesive Evenly
Use a notched trowel to spread the adhesive evenly on the substrate. Ensure that the ridges left by the trowel are consistent in height and spacing. This will help achieve a level tile installation.
Pay Attention to Tile Spacing
Use tile spacers to maintain consistent gaps between the tiles. The size of the spacers depends on the design and style of your shower, but 1/16 to 1/8-inch gaps are common. Proper spacing ensures a professional finish.
Grout with Care
After the adhesive has set, it’s time to grout. Select a grout that complements your tile and is suitable for wet areas. Ensure that the grout lines are thoroughly filled and use a grout float to smooth the surface.
Seal the Grout
To protect your shower from water infiltration, it’s essential to seal the grout lines once the grout has cured. This extra step helps prevent mold and mildew growth and extends the life of your tile installation.
Conclusion
A well-executed shower tile installation can enhance the beauty and functionality of your bathroom. By following these 12 pro tips, you can ensure that your project is a success. From careful planning and waterproofing to selecting the right materials and using quality tools, each step is crucial for a professional-looking and long-lasting shower tile installation. Take your time, pay attention to details, and enjoy the beautiful results of your hard work.